DIY: Design It Yourself All of the wonderfully refurbished pieces that I’ve seen at occasional sales have inspired me to try my hand at a few of my own. Any DIY project that I do will be super easy (I’m a newbie!) and affordable (no “Million Dollar Rooms” here!) – I hope it tempts you to try a design of your own!
∂∂∂∂∂∂∂∂∂∂∂∂∂∂∂∂∂∂∂∂∂∂∂∂∂∂∂∂∂∂∂∂∂∂∂∂∂∂∂∂∂∂∂∂∂∂∂∂∂∂∂∂∂∂∂∂∂∂∂∂∂∂∂∂∂∂∂∂∂∂∂
I got two cool candlesticks a few months ago at Flamingos Divine Finds in Minneapolis:

The problem? They just don’t work with my décor. The deep green and black are too DARK.

I still have a very important use for them, however. So I decided to re-design them. Here’s how you can do the same project yourself. Step 1: Gather supplies. I needed work gloves, sandpaper, protective eyewear, primer (especially important because the starting surfaces were so dark), and spray paint.

Oh, and don’t forget to set your work space. I used two collapsable saw horses (easier to store away!) and a simple wood board as my bench. I set everything up in the driveway – it’s essential to work in a well-ventilated space because of the paint fumes.

Step 2: Sand the candlestick holders.After I was finished sanding, I thought the candlestick holders looked so quaintly disheveled that I considered leaving them like this:

Step 3: Wash the sticks with soap and water. In the end, I had my heart set on a bold finished look, so I pushed on. So, I headed down to the industrial basement sink. Because the candlestick holders are wood, I didn’t soak them in the water, but simply splashed water on, and rubbed them with liquid soap. Then I splashed them with water to rinse off the soap.


Step 4: Let the candlestick holders dry. I dabbed the sticks with paper towel and let them dry for 20 minutes. (After cleaning them, I realized that the sticks were still too dark to work with my décor, so I realized that I would indeed need to paint them!)

Step 5: Prime. (Note: The instructions on the primer I used indicated that I needed to apply the paint with one hour or after 24 hours. I chose the first option – and applied the paint after letting the primer dry for about 30 minutes.)


Step 6: Paint. Hmmm….after the first coat, too much of the white primer was still visible, so I added two more coats.

Step 7: Smile. And put away your tools.

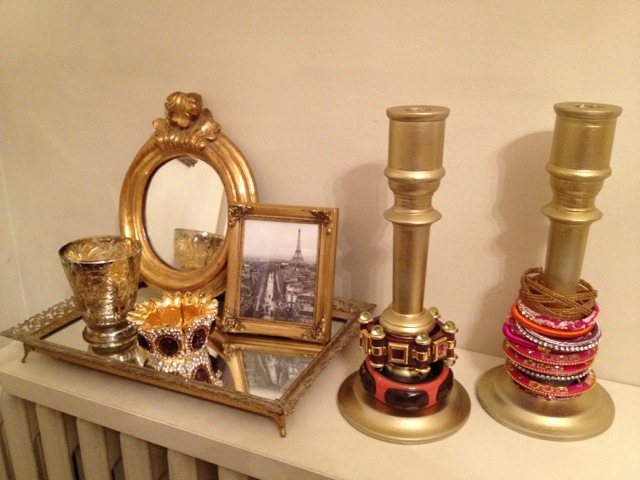
Step 8*: Add jewelry. *Optional. My intension when I bought these candlesticks was to use them as storage for my bracelets. Violà!

I’m really happy with how the candlestick holders turned out! They’re not as brassy in tone as some of the other gold items, so they tie the gold and silver pieces in the collection together nicely. Happy Designing ~ -Katherine
